搭建自建emby Premiere认证域名
两个配置二选一就行,搭建好别忘了在dns服务商那边解析好你的域名确保你能访问
1.Cloudflare Workers配置
// node_modules/itty-router/dist/itty-router.min.mjs |
2.nginx
server { |
修改 服务端dll 文件
事先准备
首先推荐你安装dnspy作为修改dll文件的编辑器
1. 安装 emby 服务端
访问 Download Emby,在”Emby Server“中选择运行的系统,在跳转的页面中选择对应的发行版和 cpu 架构进行下载,按网页上的说明进行安装。本文采用 Ubuntu 22.04 发行版进行操作,最终的安装目录为 /opt/emby-server。
在 ${Emby安装目录}/system 下找到 Emby.Server.Implementations.dll、Emby.Web.dll、MediaBrowser.Model.dll 三个文件,在 ${Emby安装目录}/system/dashboard-ui/embypremiere 下找到 embypremiere.js,这四个文件就是需要修改的文件。
2. 修改认证链接
embypremiere.js
- 使用任意文本编辑器打开,替换
https://mb3admin.com/admin/service/registration/getStatus为https://<自建认证域名>/admin/service/registration/getStatus,并保存。
Emby.Server.Implementations.dll
使用 DNSpy 打开,在 “Emby.Server.Implementations.dll” - “Emby.Server.Implementations.Security” - “PluginSecurityManager” 中找到
https://mb3admin.com/admin/service/registration/validate,在该 url 对应的变量 MBValidateUrl 上右键 - 编辑字段,修改值为https://<自建认证域名>/admin/service/registration/validate,点击确定。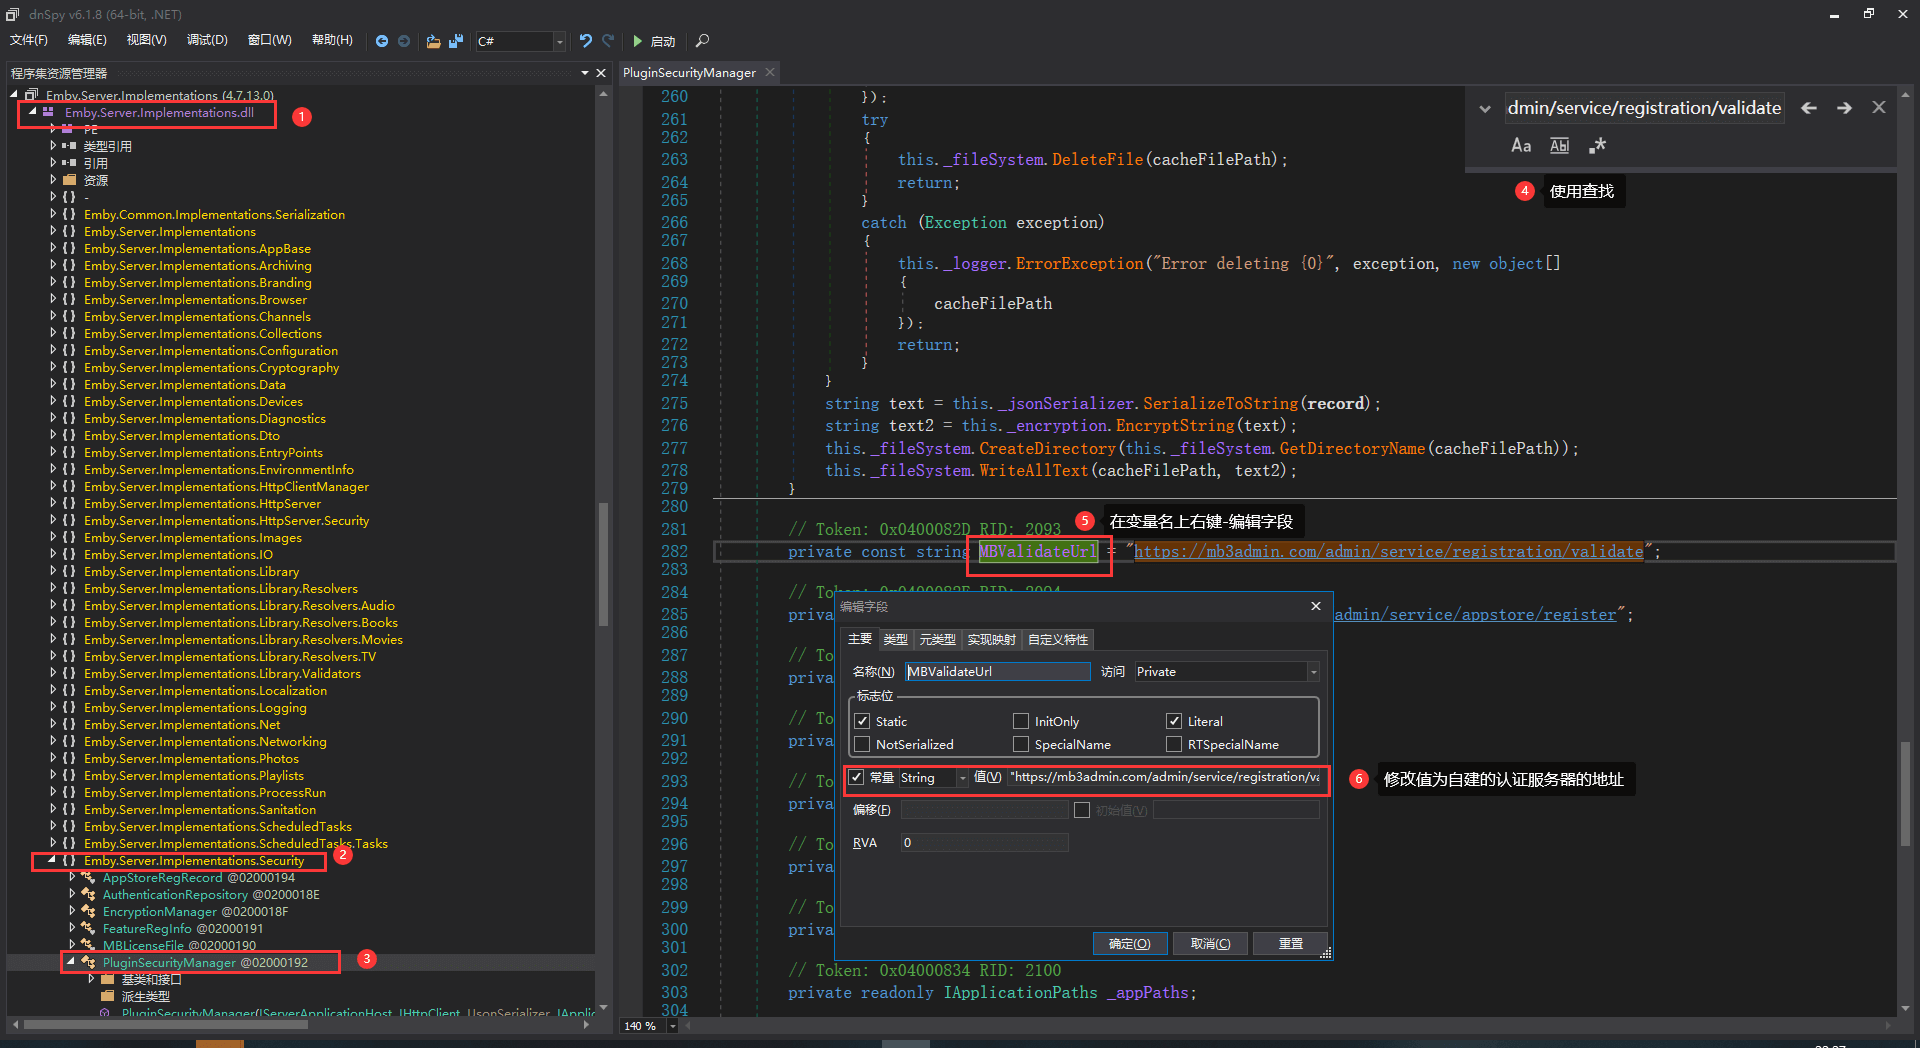
保持选择的类不变(即不要更改 1 中前三步选择的东西),将 DNSpy 切换到 IL 视图,再次查找
https://mb3admin.com/admin/service/registration/validate,在指令名上右键 - 编辑 IL 指令,在 102 行左右找到链接,修改值为https://<自建认证域名>/admin/service/registration/validate,点击确定。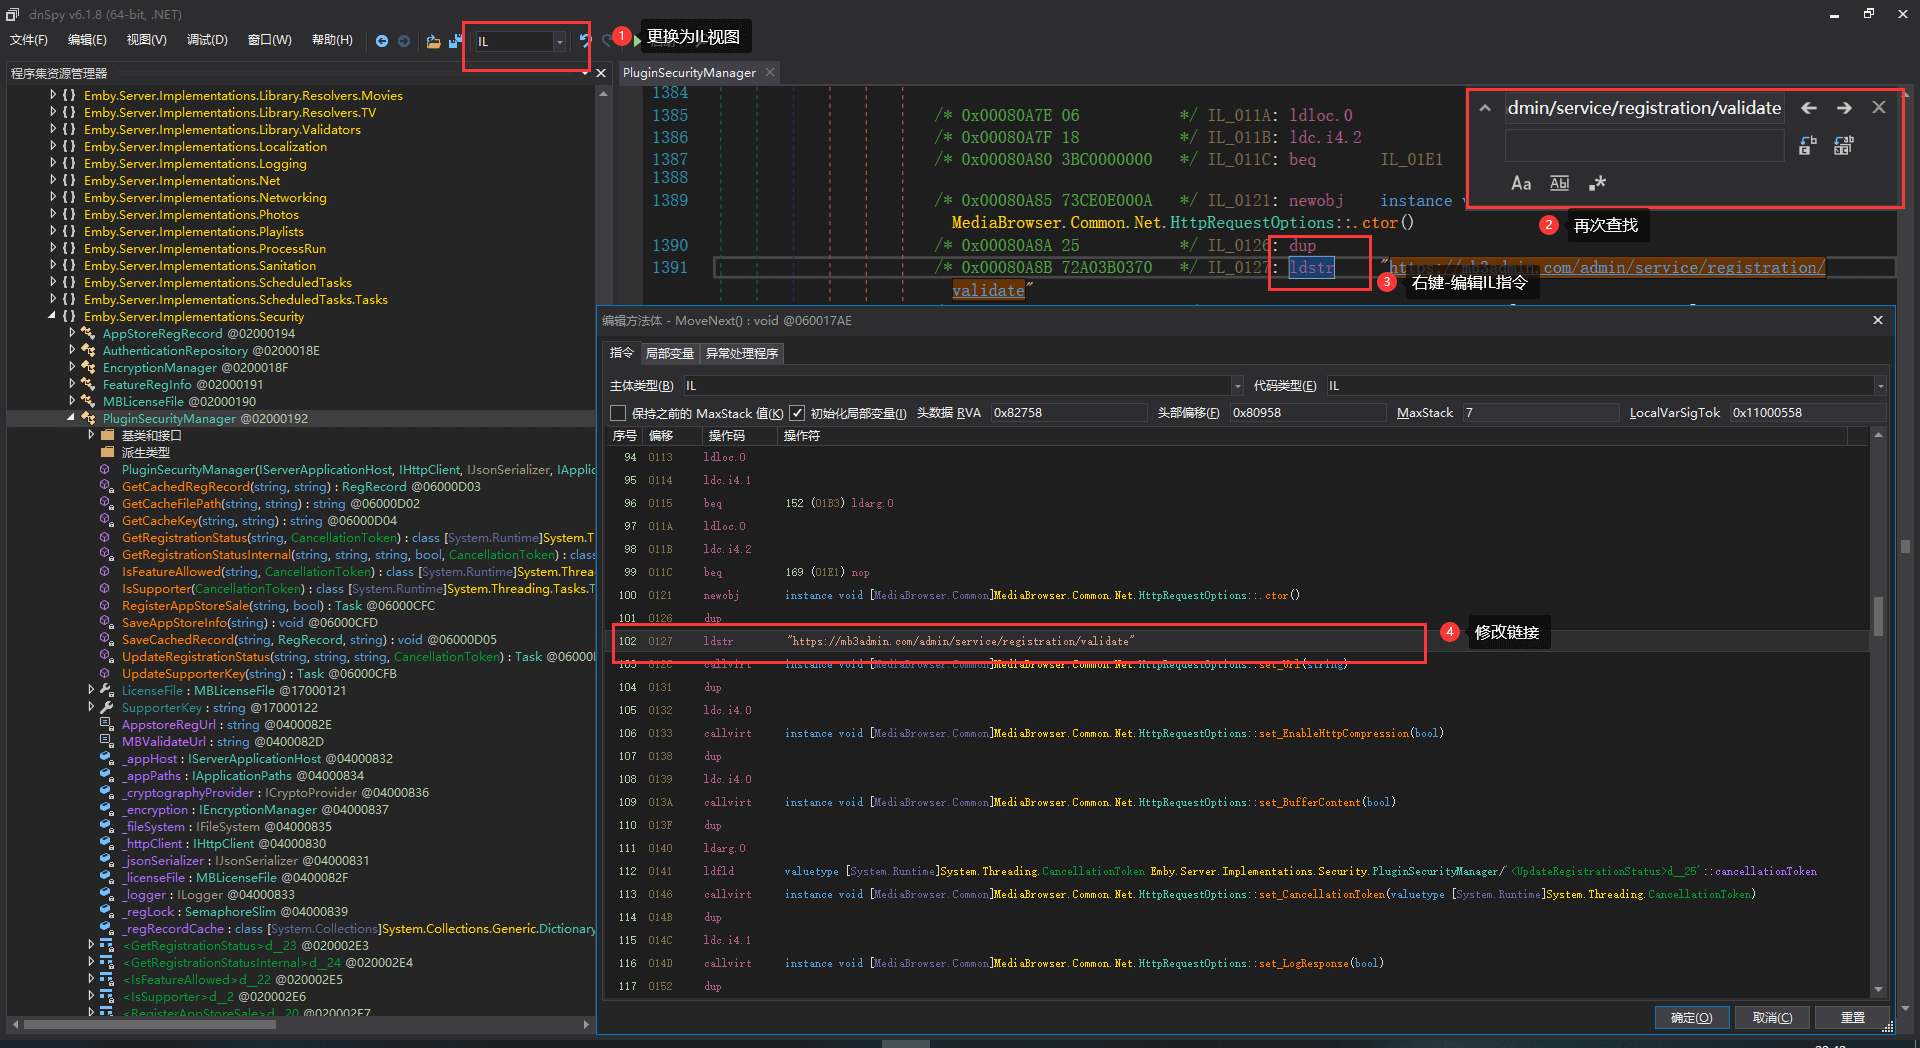
点击 DNSpy 左上角的文件 - 全部保存,默认是保存到原位置,也可以自定义保存位置。
Emby.Web.dll
使用 DNSpy 打开,在 “Emby.Web.dll” - “资源” - “Emby.Web.dashboard_ui.modules.emby_apiclient.connectionmanager.js” 上右键保存,然后再右键删除。
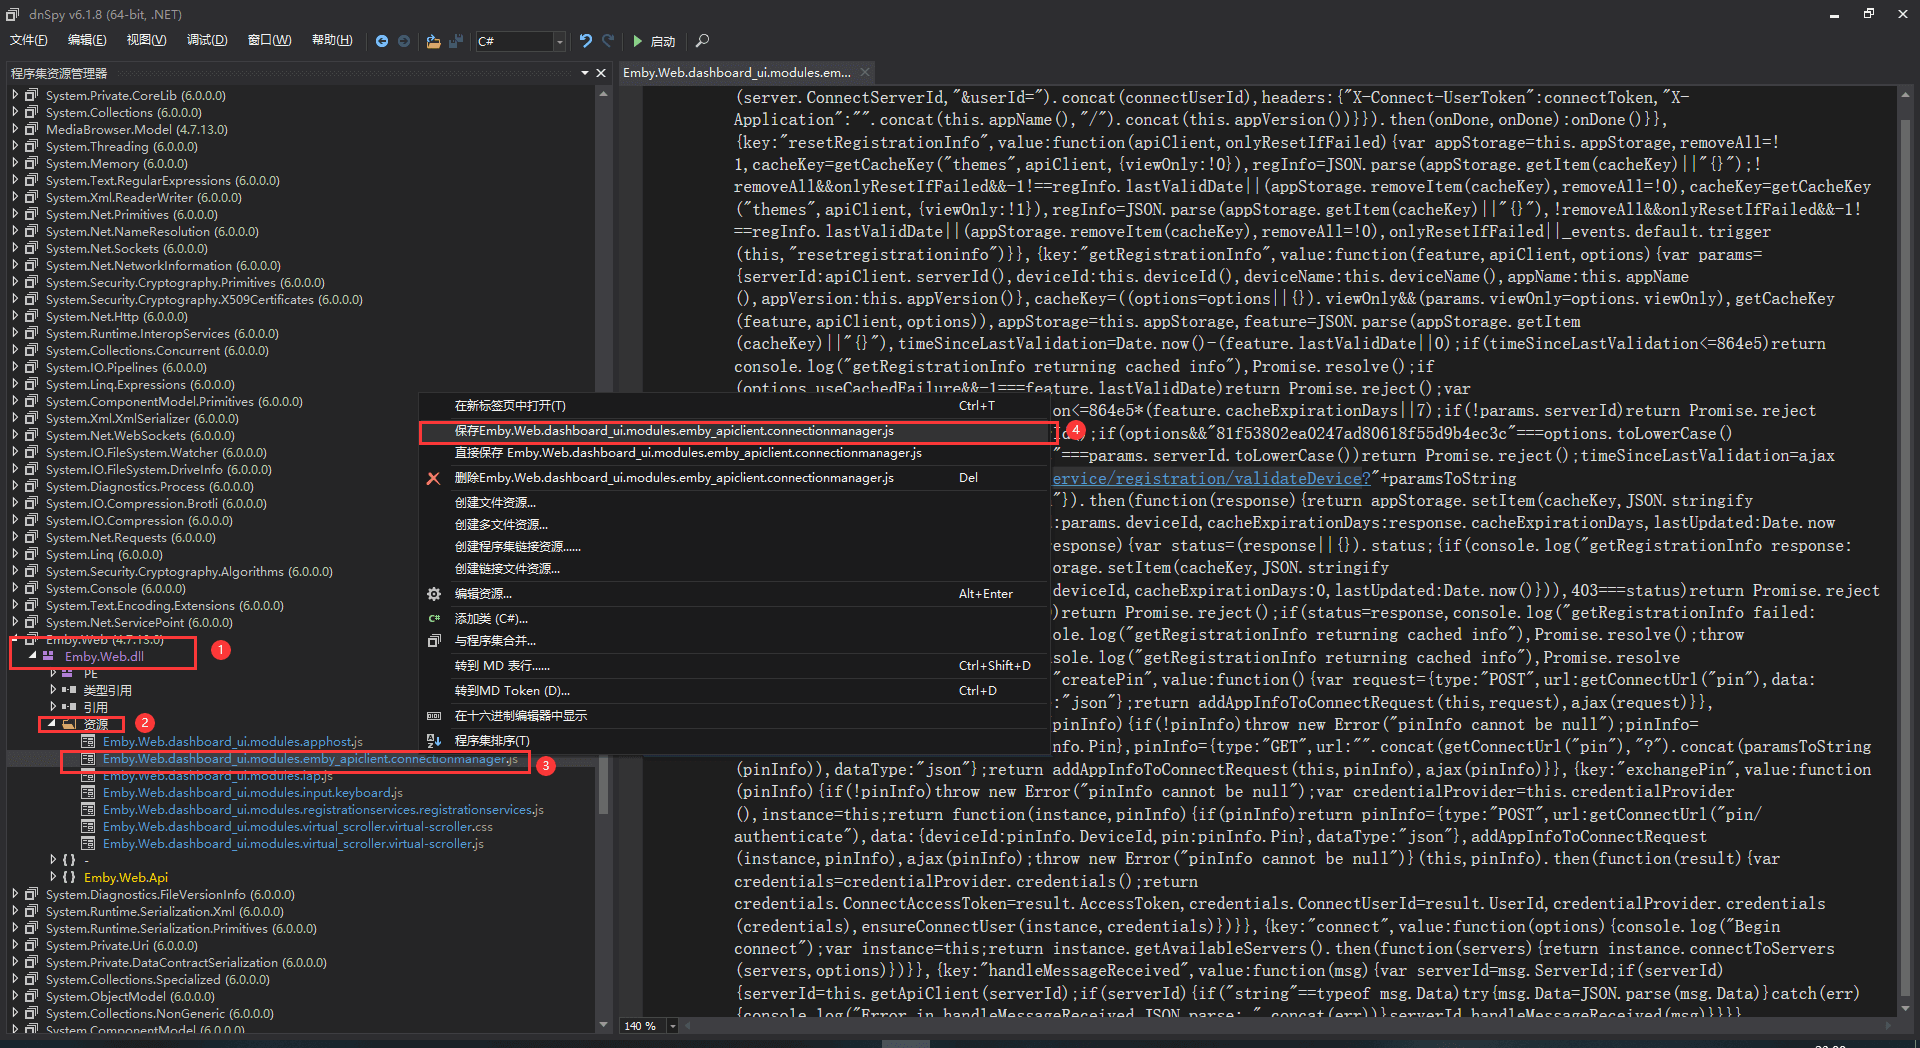
使用任意文本编辑器打开保存的文件,查找
https://mb3admin.com/admin/service/registration/validateDevice并替换为https://<自建认证域名>/admin/service/registration/validateDevice。回到 DNSpy, 在” 资源 “上右键 - 创建文件资源,将上一步中修改过的文件导入。
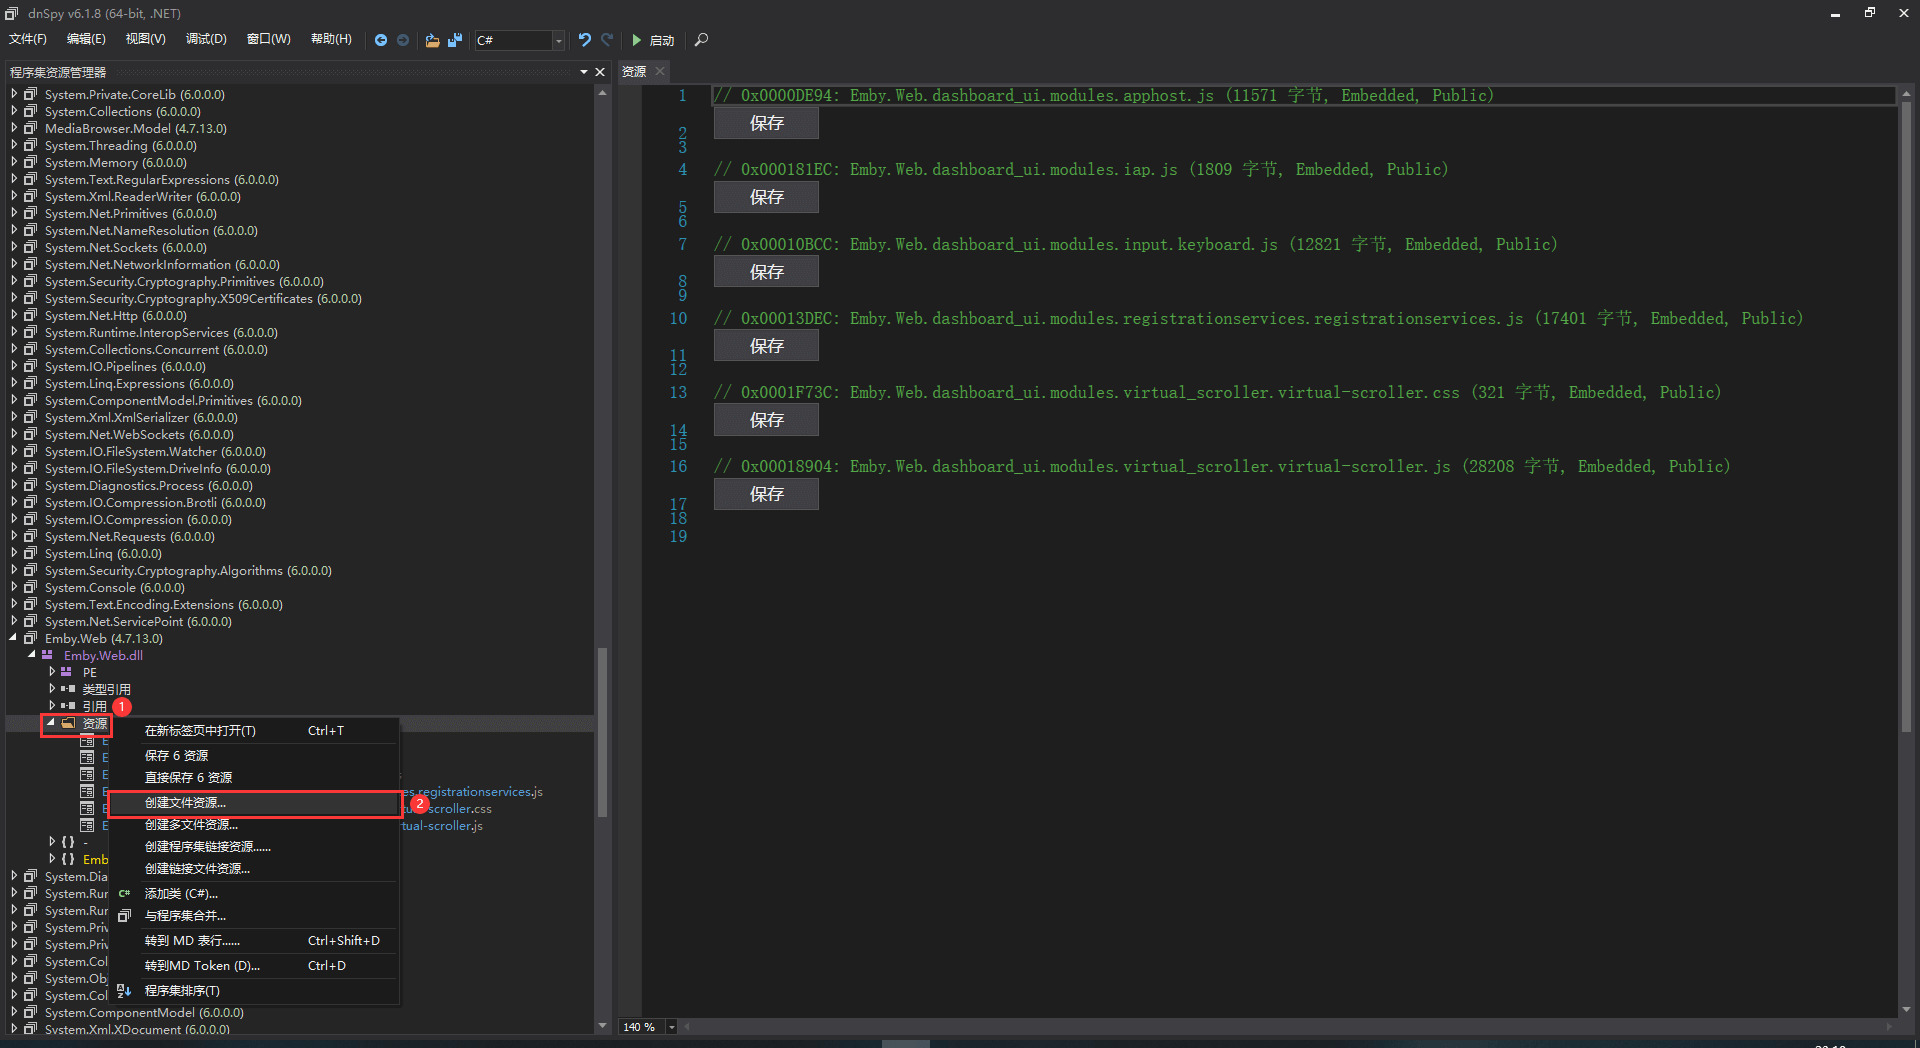
保存
MediaBrowser.Model.dll
使用 DNSpy 打开,在 “MediaBrowser.Model.dll” - “MediaBrowser.Model.Entities” - “PluginSecurityInfo” - “IsMBSupporter” 中找到
get_IsMBSupporter()方法。在该方法的 return 语句上右键 - 编辑方法,在弹出的窗口中修改该方法始终返回 true。
保存并上传到远程ubuntu服务器
3. 确定文件位置无误后重启 Emby 服务器
sudo service emby-server restart |